
My master closet makeover is something I've been dreaming about for almost a year. A year people! I've gone through so many planning options and organizational ideas but landed on some simple solutions that were cost effective as well as transitional. And although I could dream of budget-breaking closets, this is really just what I want. It's my own kind of pretty and effective.
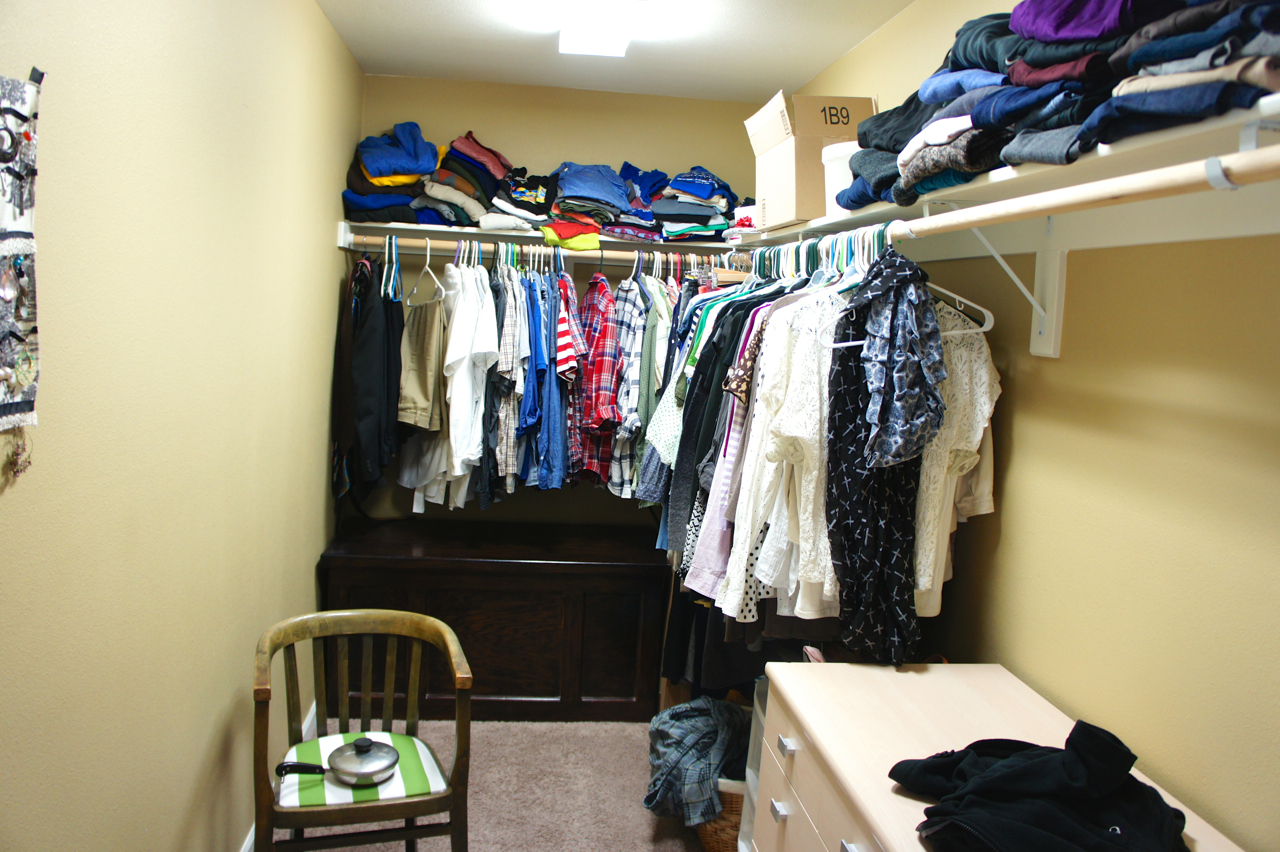
You'll notice from the "before" pictures that one of the biggest factors in this makeover was the paint color. The interior of the closet was still Sherwin Williams Camelback. The whole house was that color and I've slowly eliminated it, I still have the kids' closets, but the day will come.
The new paint color is the same as our trim Sherwin Williams Dover White. If you're looking for a warm white, this is a great option. It has a hint of yellow it in that is calming and doesn't turn bluish in bright light. It's a great pairing with our overall house color of Accessible Beige.
(Before)
Seriously, this closet needed some organization.
Emptying it all over our bedroom made the closet seem even bigger. Looking around our crazy room, it reminded me how I really never want to move again. Moving really stinks and I'm so glad we're where we're at.

(Before)

(Before)

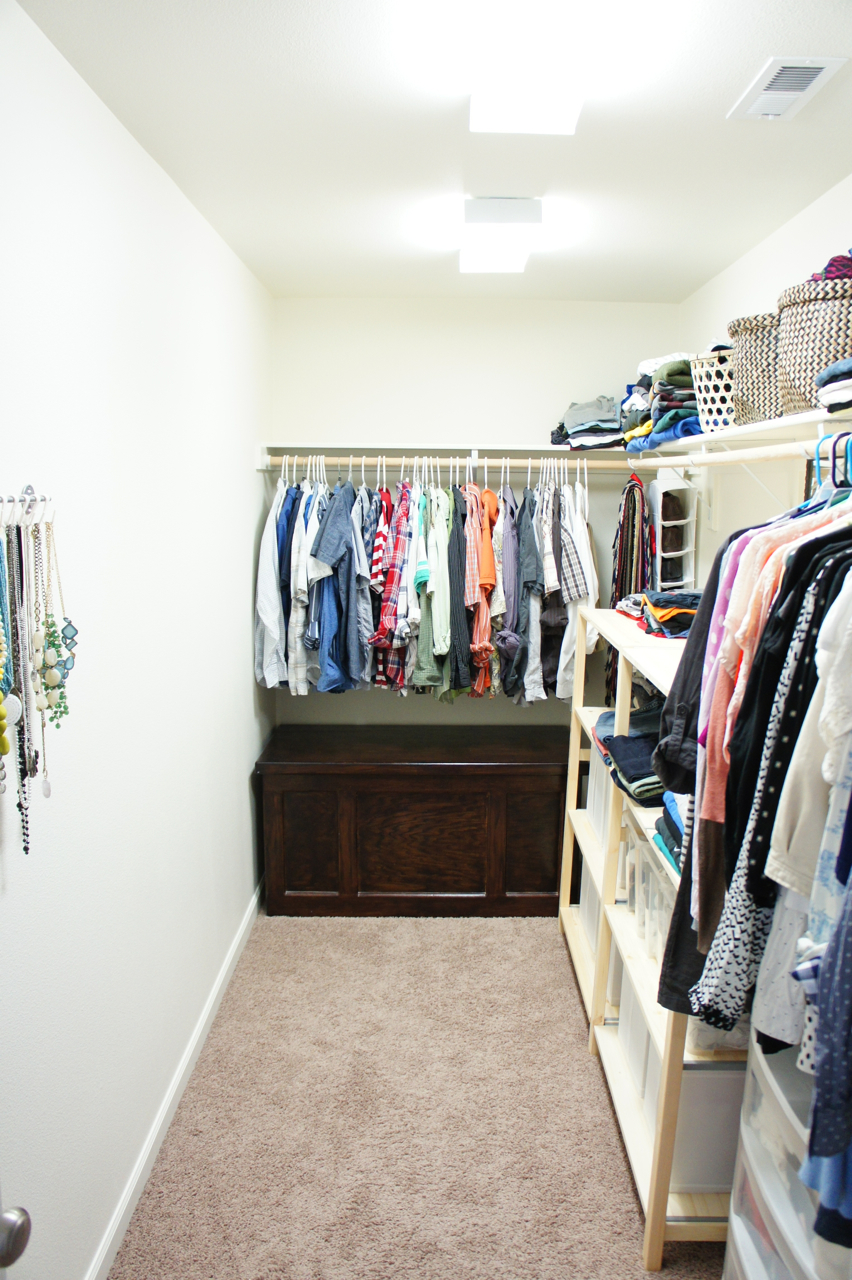
I seriously love how bright the closet looks. I love white. I love how clean it looks, how simple, and how storing, dressing, and organizing in my closet feels like something happy. It also makes me want to purge and really only have what I use, love, or find useful.

I opted to take out my hardly used earring wall holder that I made f o r e v e r ago (good idea, but I like my tiered earring stand better) and put in the bar for my necklaces in the same spot.
Once again, in this makeover I made a trip to ikea. I fully believe in their organization master-ness.
In my contemplating closet storage, these were the options:
1. built in shelves, painted the trim color, screwed to wall, not coming out - like this
2. dressers lining the long wall - like this
3. or even getting 2 tall dressers and putting them next to each other - like this
4. shelving that can be changed out, painted, stained, and moved around - like this

The one thing that has to stay is the dark brown chest in the back of the closet. My Dad made that hope chest, which we lovingly call the "coffin" because you could fit probably 2 full grown bodies in there.
This could provide some awkward conversations...on so many levels.
Kid 1, "where's mom and dad?"
Kid 2, "in the coffin."
Anyways, our closet is its home because of it's size and purpose (thank you blanket and other storage), so it needed to be worked around.
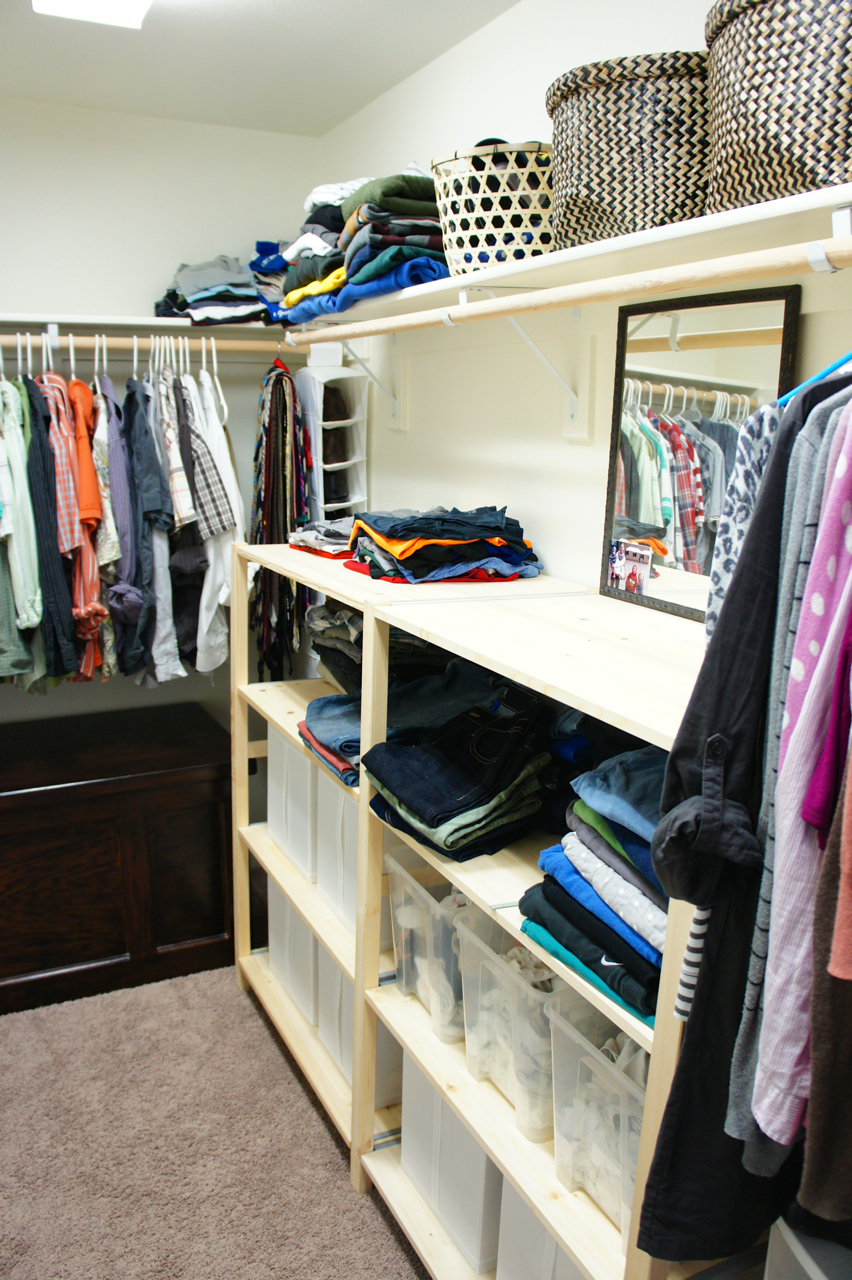
We went for storage OPTION #4. We bought some ikea ivar shelves, so simple they don't even come with directions, and I love that we could totally get more shelves and add them in. We could decide to paint of stain them. We can even change our minds all together and take them out and put something else in. (I don't see this happening).
I got several storage containers that are providing some helpful storage on the shelves, making them look cleaner and more provide more functionality.

These baskets I snagged at ikea as well. They are storing swim wear, hats, and scarves. You'll spy that I'm using the back of our door as more shoe storage. My goal in the whole project was to have nothing on the ground, everything seems cleaner that way.
Ahh...I'm so happy this project is done. My to-do list has breathed a sigh of relief and joy.

No comments:
Post a Comment
I love to hear your feedback.